To sign up for our daily email newsletter, CLICK HERE
If you’re a 3D modeler, then you know how important it is to have a reliable acrylic cutting machine. But with so many options on the market, it can be tough to decide which one is right for you.
So, we’ve done the research and compiled the best information about the acrylic-cutting machine. So whether you’re looking for something compact and portable or a heavy-duty device for large projects, we’ve got you covered. Keep reading to learn more about our top picks!
What is an Acrylic Cutting Machine?
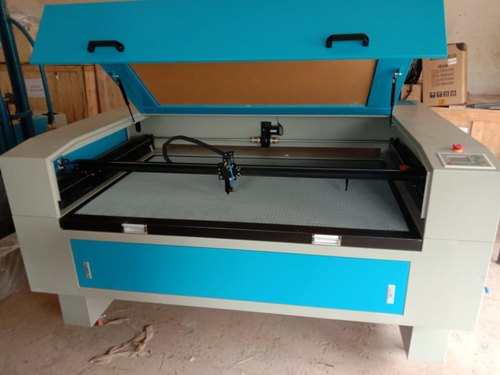
The acrylic cutting machine placed on the ground. Image source: Exporters India
An acrylic cutting machine is a specialized tool used to cut and shape acrylic materials such as plastic, glass, or wood.
These machines are designed to be versatile, precise, and highly functional, making them ideal for a wide range of applications in industries like manufacturing, construction, design, and more.
Whether you need to cut intricate patterns in small pieces of acrylic or create large sheets of material quickly and efficiently, an acrylic cutting machine has the power and precision you need for success.
So if you’re looking for a powerful and reliable way to work with acrylic materials, an acrylic cutting machine is the tool for you!
How Does an Acrylic Cutting Machine Work
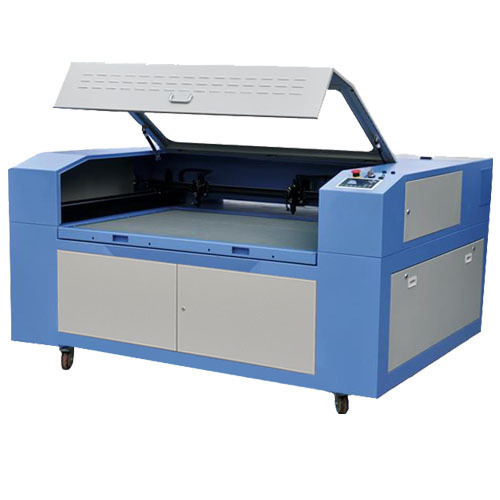
Acrylic cutting machine. Image source: India TradeBird
Acrylic cutting machines are highly specialized pieces of equipment that use advanced cutting technology to precisely cut and shape acrylic materials.
These machines utilize high-precision lasers or rotary tools, depending on the type of material being processed, to achieve highly accurate cuts with minimal waste.
To operate an acrylic cutting machine, you must first load your material into the machine’s loading tray or feeder. The machine will then run a test cut on a sample piece of material in order to determine the optimal settings for your particular project.
Once these settings have been determined, you can begin feeding your actual workpiece into the machine for cutting.
The cutting process is typically quite fast, allowing you to quickly and efficiently produce a wide variety of different shapes, sizes, and patterns.
Additionally, advanced acrylic cutting machines are capable of working on both flat and curved surfaces, allowing you to work with a wide range of different materials and applications.
The Benefits of Using an Acrylic Cutting Machine
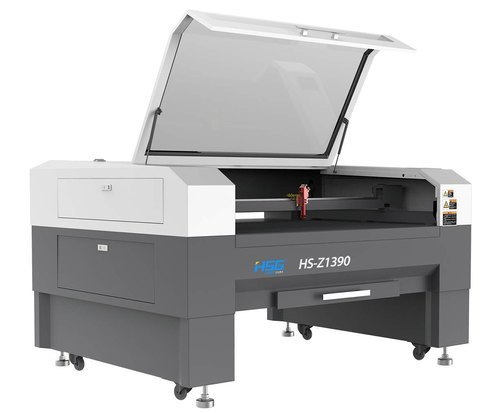
White and Grey color acrylic cutting machine. Image source: Laser technologies
An acrylic cutting machine is an essential tool for any artist or designer looking to create detailed and precise cuts in acrylic materials. These machines are highly versatile, allowing users to achieve a wide range of effects, from intricate patterns and designs to smooth, clean edges.
One major benefit of using an acrylic cutting machine is that it allows you to work faster and more efficiently than traditional methods like hand-cutting or engraving.
Since these machines can easily and precisely control the depth, angle, and speed of cuts, you can get clean results quickly without having to worry about making mistakes or wasting time trying to perfect your technique.
Another advantage of using an acrylic cutting machine is that it gives you greater design flexibility. With this tool at your disposal, you can create intricate patterns and designs that would be difficult or impossible to achieve by hand.
Whether you’re working on a personal project or designing for a client, this level of precision can help ensure that your final product is exactly what you envisioned.
If you’re looking for a powerful tool to help take your creativity to the next level, an acrylic cutting machine is an excellent choice. Whether you’re a professional artist or designer, or simply someone who loves crafting with acrylic materials, this versatile and precise tool can help elevate your work to new heights. So why not give it a try today?
How to Use an Acrylic Cutting Machine
An acrylic cutting machine is a versatile tool that can be used to easily and accurately cut a variety of different materials, such as plastics, wood, metal, and more.
Whether you are a DIY enthusiast looking to create your own custom signs or decorations, or a professional fabricator looking to streamline your production process, an acrylic cutting machine can help you achieve great results quickly and easily.
Some key features to look for when choosing an acrylic cutting machine include precision control features, compatibility with a wide range of materials, and safety features that prevent injuries from accidental mishaps.
If you are new to using an acrylic cutting machine, it is important to start with some basic training on how to use the machine safely and effectively. This can include learning about the different settings and controls, as well as practicing on a variety of materials so that you can become familiar with the capabilities of your machine.
With the right knowledge and skills, an acrylic cutting machine can be a powerful and versatile tool for all your crafting and fabrication needs.
So whether you are looking to create custom signs or decorations for your home, or need to streamline your work processes in a professional setting, an acrylic cutting machine is sure to help you achieve great results quickly and easily.
Tips for getting the most out of your acrylic cutting machine
Whether you are just getting started with an acrylic cutting machine, or are a seasoned pro looking to get the most out of your machine, there are a few tips and tricks that can help you achieve better results.
One of the most important things to keep in mind when working with an acrylic cutting machine is that it works best on thick, sturdy materials. This means that you should avoid using paper or thin plastic materials, as they may not cut through cleanly or may snag or warp during the cutting process.
In addition to choosing the right material for your project, it is also essential to take care when calibrating and setting up your machine. Be sure to follow all instructions carefully, and double-check that everything is aligned and properly in place before turning on your machine.
Finally, it is important to experiment with different settings and cutting speeds until you find the right combination that works best for you and your project. This may take some trial and error, but it will be well worth the effort when you are able to achieve clean, crisp cuts every time. Whether you are just getting started with acrylic cutting machines or are a seasoned pro, these tips will help ensure that you get the most out of your machine and create beautiful projects with ease.
Key Things to Consider When Shopping for Acrylic Cutting Machine
Acrylic cutting machines are powerful tools that can be used for a variety of applications, from creating custom signs and signage to the precision cutting of materials for DIY projects.
Whether you are a professional designer looking to streamline your production process or an avid DIYer looking to create unique pieces, an acrylic cutting machine is a perfect tool for the job.
With a wide range of features and options available, choosing the right acrylic cutting machine can seem like a daunting task. Here are some key things to consider when shopping for one:
- Consider your material needs. Acrylic cutting machines come in all shapes and sizes, with different capabilities depending on the type and size of materials that you work with. If you need precise cuts or intricate details, look for machines with high-powered cutting heads and advanced software.
- Think about your budget. Acrylic cutting machines can range in price from a few hundred dollars to several thousand, depending on the features and capabilities that you need.
Consider what is most important to you – do you need a machine that is highly accurate or are you more focused on speed? Do you plan to use your acrylic cutting machine frequently, or just on occasion? These factors will help inform your budget considerations when shopping for an acrylic cutting machine.
- Look for reliability and support. Whether buying new or used, be sure to check out reviews from other users to get an idea of the quality and performance of different acrylic cutting machines. Also, look for companies that offer reliable customer support, in case you need help troubleshooting any issues or getting started with your machine.
3D Printing and Acrylic Cutting
Combining acrylic cutting and 3D printing can open up a range of possibilities for creating intricate and customized designs. Here’s a step-by-step guide on how to use acrylic cutting and 3D printing together:
- Design your model: Start by creating a 3D model of your desired design using 3D modeling software. You can use popular programs like Autodesk Fusion 360, Tinkercad, or SolidWorks. Ensure that the design incorporates elements that will require both acrylic cutting and 3D printing.
- Separate the design: Identify the parts of your design that will be 3D printed and those that will be acrylic cut. You can do this by splitting the 3D model into different components or by using different colors or layers to represent the different manufacturing methods.
- Prepare for 3D printing: Export the parts of your design that will be 3D printed as STL (Standard Tessellation Language) files. Check the exported files for any errors or issues using 3D modeling software or dedicated file repair tools. If necessary, scale or orient the parts to fit your 3D printer’s specifications.
- 3D print the components: Use your 3D printer to print the parts of your design that you designated for 3D printing. Follow the manufacturer’s instructions for setting up the printer, selecting the appropriate filament material, and adjusting printing parameters such as layer height and print speed.
- Post-processing: After the 3D printing is complete, remove any support structures if applicable, and perform any necessary post-processing steps like sanding or smoothing the printed parts. Depending on your design, you may also need to drill holes or perform other modifications to prepare for acrylic cutting.
- Prepare for acrylic cutting: Once your 3D printed parts are ready, measure and mark the areas where you want to incorporate acrylic components. Identify the dimensions and shapes you need for the acrylic pieces and transfer those measurements onto the acrylic material.
- Acrylic cutting: Use an appropriate tool, such as a laser cutter or CNC router, to cut the acrylic material based on the dimensions and shapes you marked. Set up the cutting machine according to the material thickness and type you are using. Follow the safety guidelines and operating instructions for your specific cutting equipment.
- Assembly: After the acrylic cutting is complete, test-fit the acrylic components with the 3D printed parts. Make any necessary adjustments to ensure a proper fit. Depending on your design, you may need to use adhesives, screws, or other fasteners to securely attach the acrylic and 3D printed parts together.
- Finishing touches: Once the assembly is complete, you can add any desired finishing touches like painting, sanding, or polishing to achieve the desired aesthetic.
