To sign up for our daily email newsletter, CLICK HERE
We’ve got a better response rate when we customize our Google Forms.
Because a well-customized Google Form looks more professional and also aligns with your brand identity, making it easier for respondents to connect with your content.
So today, we’ll share 7 tips from our experience on how to customize your Google Forms. Let’s dive in!
Tip 1. Add a Logo or Header Image
Adding a logo or a header image to your Google Form is a simple way to enhance its visual appeal and reinforce your brand identity.
Including a recognizable logo or a header image at the top of your form makes it look more professional and cohesive with your other branded materials. To add a header image, go to the “Customize theme” option in Google Forms and select “Choose image”.
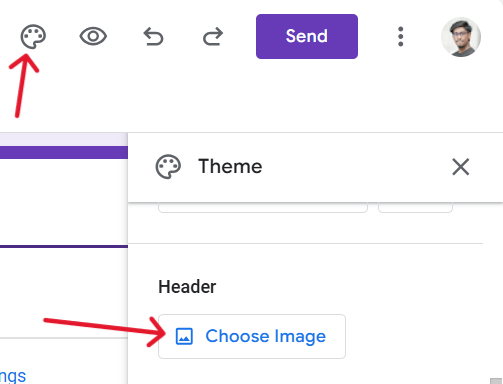
Alt tag: red arrow pointing to “Customize theme” and another red arrow pointing to “Choose image” in theme settings
You can upload your own branded image or logo, ensuring it fits well by adjusting its size and position.
For detailed guidance on the optimal dimensions for Google Form headers, you can check out the Supatool article: Google Forms Header Image Size: What’s The Right Dimension
Tip 2. Customize the Theme and Colors
Customizing the theme and colors of your Google Form is essential for creating a visually appealing and branded experience. To change the theme, click on the “Customize theme” option.
From here, you can adjust the form’s background color and form color. Choose colors that align with your brand’s color palette for consistency.
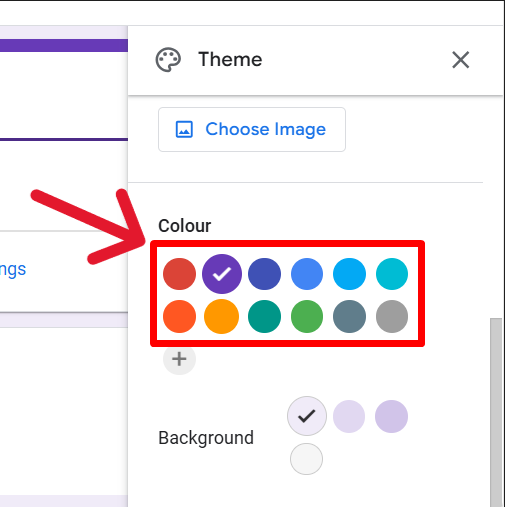
Alt tag: red arrow pointing to color option in google forms theme settings
Google Forms also allows you to upload custom visuals, like background images, to further enhance your form’s look. Consider using stock image resources like Unsplash to find high-quality images that match your theme.
By carefully selecting a cohesive color scheme and visuals, you can make your form more attractive and inviting, encouraging users to complete it.
Tip 3. Customize the Font
Changing the font style in your Google Form can make a significant difference in readability and aesthetic appeal.
To customize fonts, go to the “Customize theme” section and look for the “Text style” area. Here, you can modify the fonts for the header, questions, and response text.
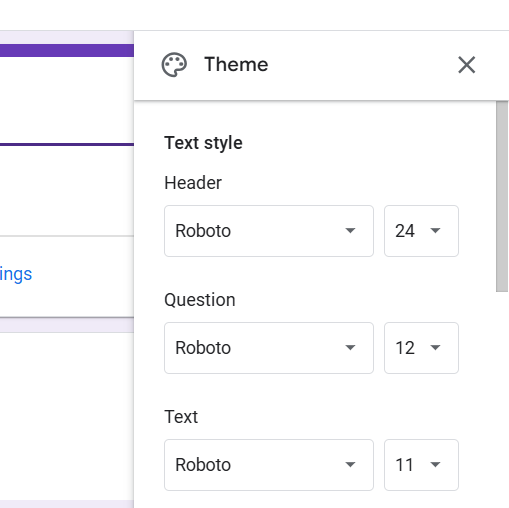
Alt tag: text style for header, question and text in theme settings
For example, using a bold font like ‘Impact’ for headers can make your form titles stand out, while ‘Lexend’ works well for questions to ensure they are clear and easy to read.
Consider combining different fonts for a balanced look — a bold font for titles and a simpler font for body text to maintain readability and visual harmony throughout your form.
Tip 4. Use Sections and Page Breaks for Better Organization
Using sections and page breaks in Google Forms helps to break down longer forms into manageable parts, making them easier for users to navigate.
This feature allows you to group related questions together under different sections, reducing the cognitive load on respondents and helping them focus better.
To add a section, click on the “Add section” button on the right side of existing section.
Alt tag: red arrow pointing to “Add section” icon
Tip 5. Personalize Questions with Conditional Logic
Personalizing questions with conditional logic makes your Google Forms more interactive and customized to each respondent.
Conditional logic, also known as “Go to section based on answer”, allows you to show or hide specific questions depending on the user’s previous answers.
To set it up, select the three dots next to a question, choose “Go to section based on answer,” and assign each answer to a specific section.
Alt tag: red arrow pointing to “Go to section based on answer”
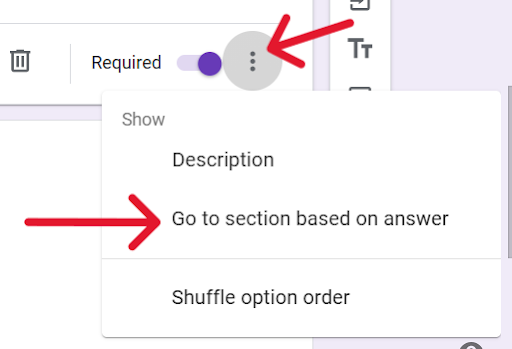
This feature helps prevent irrelevant or repetitive questions, creating a streamlined experience that feels more customized.
By making the form more relevant to the user, you not only improve the overall user experience but also increase the likelihood of form completion.
Tip 6. Add Custom Confirmation Messages
Adding a custom confirmation message in Google Forms allows you to personalize the experience even after the user submits their response.
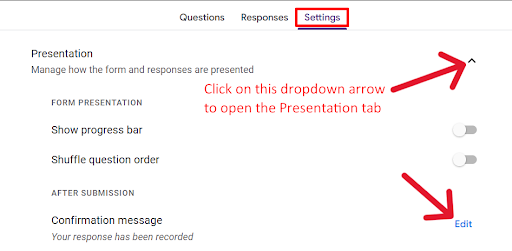
To customize the confirmation message, go to the ‘Settings’ tab, and under ‘Presentation’, you can enter a unique thank-you message.
Alt tag: red arrow pointing to edit option for confirmation message in ‘Presentation’ tab
This message can express gratitude, provide follow-up information, or direct users to another resource, such as a website or survey.
A personalized thank-you note creates a positive final impression, showing respondents that you value their participation.
It’s a simple yet effective way to enhance user experience and encourage future engagement.
Tip 7. Embed Videos or Images in Questions
Embedding videos or images directly into your Google Form questions can make your form more engaging and interactive.
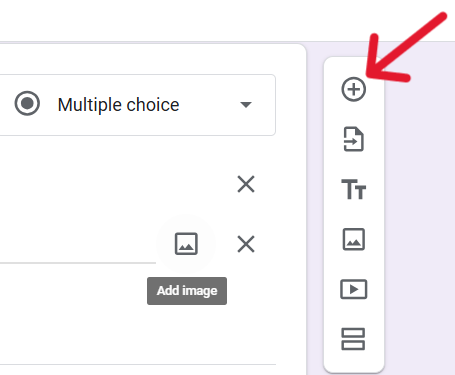
To add multimedia, click on the “Add image” icon next to a question.
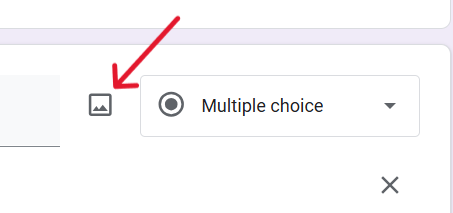
Alt tag: red arrow pointing to “Add image” icon next to a question in google form
This feature is particularly useful in scenarios like surveys, educational assessments, or training modules, where visual context can help clarify questions or provide additional information.
For example, adding a relevant image or instructional video can make questions more dynamic and easier to understand, increasing the likelihood of accurate responses and user engagement.
Multimedia elements make your form stand out and cater to different learning and response styles.
Frequently Asked Questions
How do I make my Google Form look professional?
To make your Google Form look professional, use consistent branding elements like logos, custom colors, and fonts that align with your business identity. Incorporate sections for better organization and use multimedia to enhance engagement.
Can I edit a Google Form after sharing it?
Yes, you can edit a Google Form even after sharing it. Changes will automatically update for all respondents, but be cautious when modifying existing questions to avoid confusion.
How can I make my Google Form more interactive?
To make your Google Form more interactive, utilize features like multiple-choice grids, dropdown menus, and image-based questions. You can also add videos and images to provide context or instructions, create sections for a better flow, and use response validation to guide respondents. These elements not only make the form more engaging but also help in collecting more accurate data.
Conclusion
By implementing these seven tips, you can easily personalize your Google Forms to enhance both visual appeal and user experience.
Customizing your forms allows you to align them with your brand, make them more engaging, and collect more accurate responses. Don’t stop at just the basics—explore the advanced features Google Forms offers to further elevate your form-building skills.
From embedding videos and images to adjusting themes and colors, the possibilities are endless.
Start customizing your forms today to create more interactive and effective surveys, quizzes, and more.
