To sign up for our daily email newsletter, CLICK HERE
We can all vouch that mobiles and smart devices have changed the world as we know it in the last few decades. People are now using their mobile not only for critical tasks like banking, tax filing, etc. but also for day-to-day tasks like grocery shopping, booking a cab or a doctor’s appointment, etc.
As per Statista, till the first quarter of 2021, more than 50% of the total population of the world were mobile users. It’s hard for us to move out of the house without a smartphone in our pocket.
But what does it mean for app developers? The competition is getting huge. If we take an example of an app that serves a specific purpose, we will find hundreds of similar apps in app stores. This means, if users find something wrong with your app, they won’t think twice before switching to another better app.
So, in order to deliver the best experience to your users, as a mobile app developer, you must test your app and ensure it offers the ultimate user experience.
Based on that, in this post, we are going to discuss testing a mobile app on simulators and emulators. Let’s get started.
Difference Between Simulators and Emulators
There is no replacement for testing a mobile app on a real device. You can check the basic functionality and also perform performance and load testing. However, a debate has been going on that app testing on simulators and emulators is cost-efficient. But what are simulators and emulators?
Simulators are preferred by testing teams when they need to check the internal behavior of an app, like dependency on firmware or hardware. You can use simulators when you need to simulate the internal state of your mobile.
oN the other hand, emulators mock the features of any mobile on your computer. You can use emulators when you need to check the outer behavior of your app. You can use emulators to check the user experience and basic functionalities.
Challenges of Testing on Simulators and Emulators
Testers often faced quite a few common issues while testing on simulators and emulators. Let’s list down a few.
Scalability
A major problem that testers face while testing an app on the simulator is scalability. Often, issues have occurred when testers couldn’t simulate device compatibility issues that didn’t occur on the simulator but occurred on a real device, depending on factors like the wide aspect ratio of an iPhone, or the notch of Galaxy S8, etc.
Testing on iPad
Testing on real iPads also often generates a lot of errors that are undetected on simulators. This is because iPads can rotate 360 degrees. As a result, often part of an image got missed while rotating.
Performance Testing
It is not always possible to check the real-time performance of a mobile device on an emulator or a simulator. For example, how will the app work when thousands of users are trying to access a specific feature at the same time? Or, how will the UI render if the user is at a very low network zone?
Now that we have discussed the challenges that come with mobile app testing on simulators and emulators, let’s discuss how to overcome those challenges and effectively test your mobile app.
How to Test Your App on Simulators and Emulators
We will be using Lambdatest’s cloud-based native mobile app testing services for this.
Upload Your App
First of all, you need to sign up. Then you need to upload your app. If you don’t have your app ready and just need to test the features, no need to worry. There is a sample app that will help you to get started.
- Login to your account.
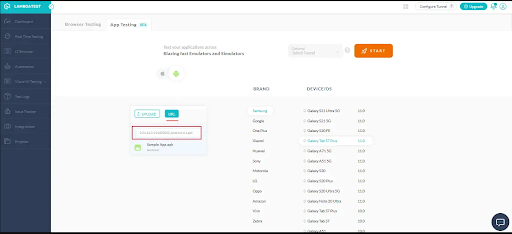
- Go to “Real Time Testing” and from there, navigate to “App Testing”.
- Click on “Upload”. Browse your app or drag and drop it. Uploading will take some time depending on the size of your app as well as the network bandwidth. Please note, the size limitation of a .apk file is 300 MB.

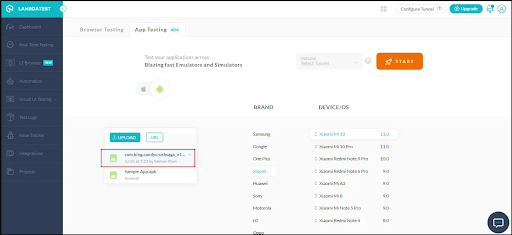
- You can also upload your app via the public cloud link. Click on “URL”, enter the url of the app source, and hit Enter.
Testing Your App
We will find out how to test an android app.
- After you have uploaded the app, click on “START”.
- You will be able to see an Android emulator where you can test your native application.
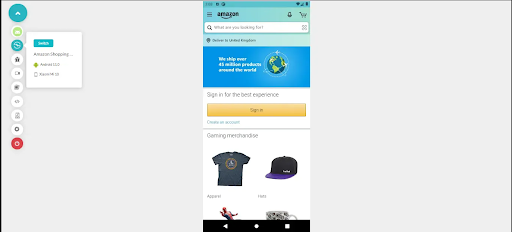
- You can also test your iOS app by performing similar tests on the iOS simulator by clicking on “Switch”.
Found the Bugs – Now What?
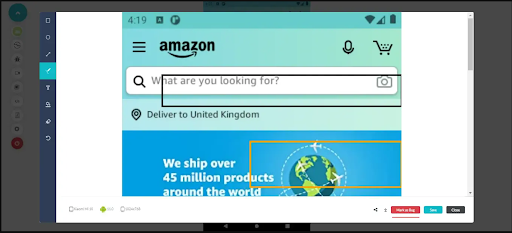
After launching the emulator, you will find a “Mark as Bug” icon on the navigation panel on the left-hand side. Click on it after you have found a visual bug. It will capture a screenshot.
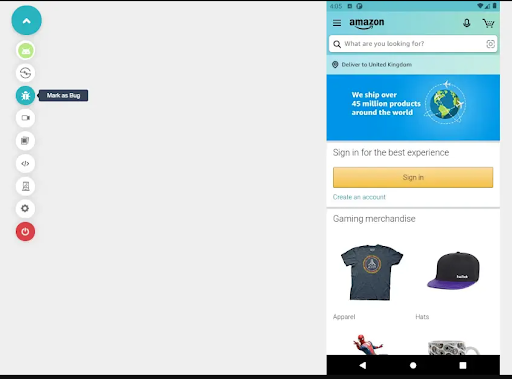
Once you have captured the screenshot, you will be able to highlight the issue by using the built-in image editor. Once done, click the “Download” icon to download the screenshot.
After marking the bug an interface will appear labeled “YouTrack”. There, you will need to fill up the bug details and click on “Create Issue.”
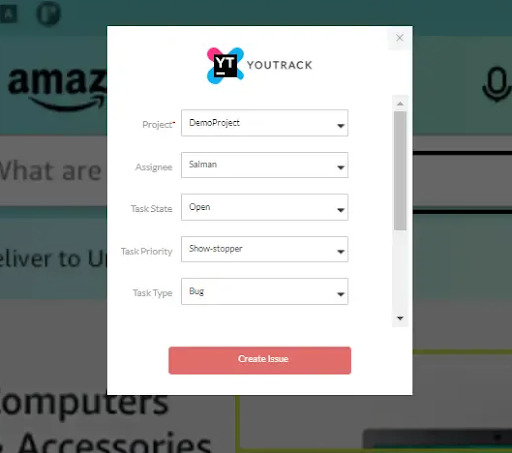
That’s it, your bug is successfully recorded.
Not only screenshots, but LambdaTest also offers you the option to record a video.
Click the “Video” icon on the left navigation panel.
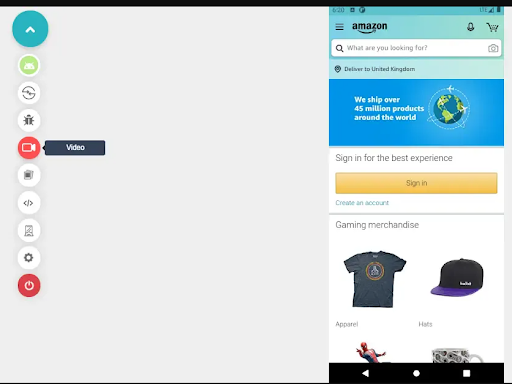
Your recording will start. Record the user activity and click the button again to stop recording.
To view the saved recordings, click on the “Gallery” icon. You can download any individual recording by clicking the download button.

Is the Tool Really That Efficient?
Well, first of all, the tool is helpful not only for testers but for developers as well. For example, with dev tools, you can debug your apps on Android and iOS. LambdaTest allows you to view App Logs, Device Logs as well as Network logs. This means you can check how your app performs and can also record the network conditions at which your app underperforms. Not only that, this cloud-based testing tool also helps to –
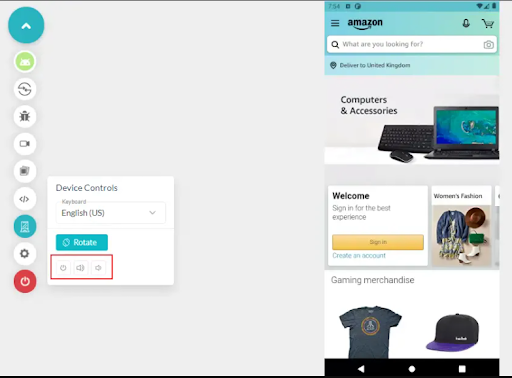
- Change your keyboard’s input language and find out how much useful the app is for a user whose language is different.
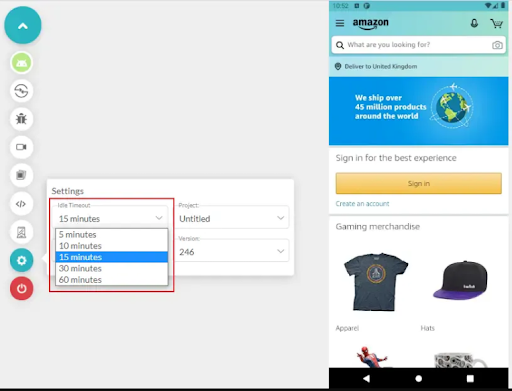
- You can check whether the session ends after the idle timer exceeds by clicking on “Settings” and setting up the desired idle time out.
- “Device Controls” will help you to rotate your screen and check the app on different orientations.
- You can also check how the app performs while the user performs native device operations, like increasing or decreasing volumes, or putting the device in sleep mode.
- Geolocation testing can also be performed for more than 50 countries in US, EU, as well as Asian countries.
What After I’m Done With Testing
Once you are done with testing, you can kill the session of your running app by selecting the Android icon from the navigation panel and click on “Kill App”.

You can also uninstall your app by clicking on the option to uninstall.
After you are done with testing, click on the button that seems like a device power button icon at the extreme end, You will get a popup. Click on “Yes, End Session”. That’s it. You will be logged out from your session.
Is it Really Worth the Effort?
Well, there is no replacement for testing an app on a real device. No matter how accurate they are, there will be some issues, either functional or performance, or usability wise that you can test accurately on the real device only. However, there are hundreds of devices nowadays, each with its own operating system, resolution, and other features. Trying to test your app in all of them will increase your budget by a huge extent. Hence, it’s ideal to prioritize the devices that you are targeting. After that, choose a cloud best simulator or any other simulator or emulator of your choice and start bug hunting.
