To sign up for our daily email newsletter, CLICK HERE
Recording screen was not a popular topic previously and most of the people used to take screenshot for sharing the data of their computer with the other people. But now a day due to the popularity of the social media sites such as YouTube people likes to share their personally created tutorial videos over the internet to help people. In that case people need to record their system screen to show every step of solving a problem. Sometimes people also record the videos for training purpose for their students or company employees. Well, there are several screen and audio recorder available over internet which can help you to record the videos and we have shortlisted one best program for you which we are going to share in this article.
For your need for screen recording and sharing, we recommend Wondershare DemoCreator. This software is available for the Windows and macOS. Wondershare DemoCreator is a one stop computer screen recorder solution for all your recording and video editing needs. It allows you to record the system videos in high quality with clear audio output. Wondershare DemoCreator is not only a screen recorder with internal audio but also a video editor and you can make your video beautiful to post on YouTube directly from the program interface.
How people can record screen and audio with Wondershare DemoCreator
Step 1:
You can record the screen in HD quality. Firstly, download the Wondershare DemoCreator from the official website and then install it. After installation run the program on your computer. After running the program you need to click on the “New Recording” button.

Step 2:
Now, the program will open a new screen. Here, you have to select the area of your computer which you want to record. You can use the dotted red color bar to adjust the recording area size of you can also manually enter the size of screen.

Step 3:
Now you have to select the webcam settings and audio recording settings. You can select these settings from the program settings popup.
Step 4:
Finally after setting everything you need to click on the “Red Color” big record button to start the recording. Once you have finished the recording you need to click on the Stop button to finish and save the recording.
Step 5:
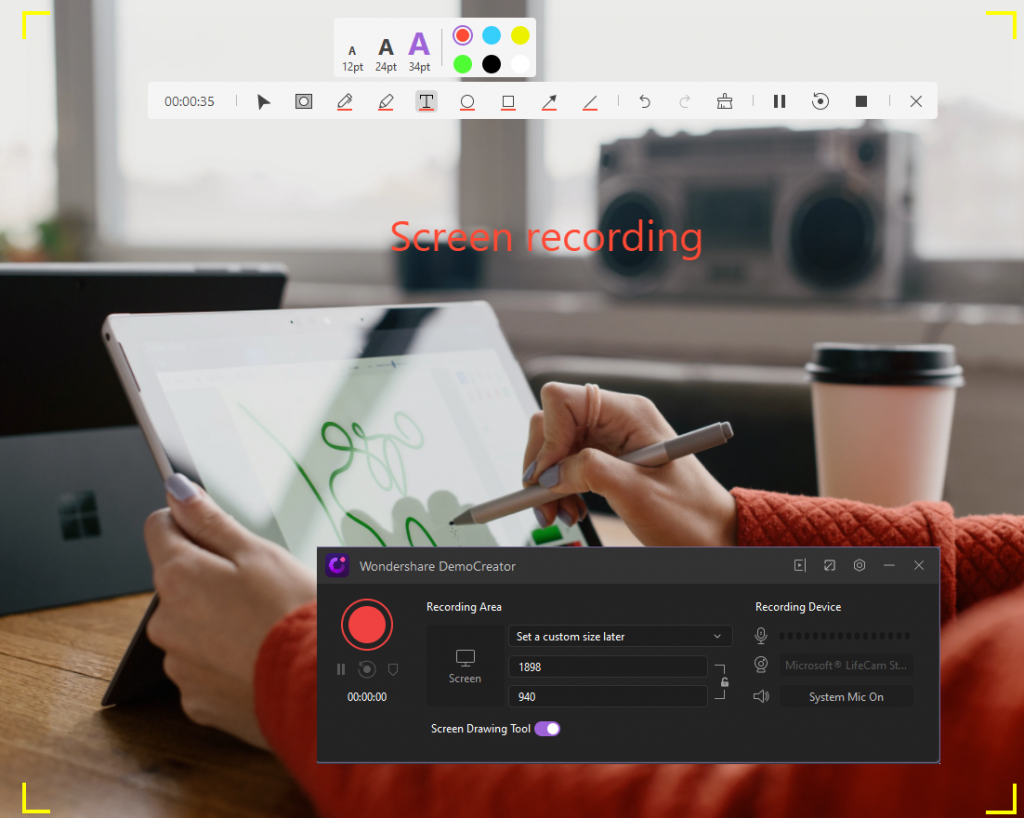
DemoCreator comes with the screen drawing tool as well. Whenever you make guide tutorials for posting over internet to help people then this tool is really helpful for you. Using screen drawing tool you can draw on the screen while recording your screen to give instructions to your viewers. To use this tool you just need to turn on “Screen Drawing Tool” under the popup after first launch. After clicking on the screen drawing tool you will see a toolbar here you can select the Pencil, Text Box and many more other options to choose with the video you are recording.
How to edit your video after recording
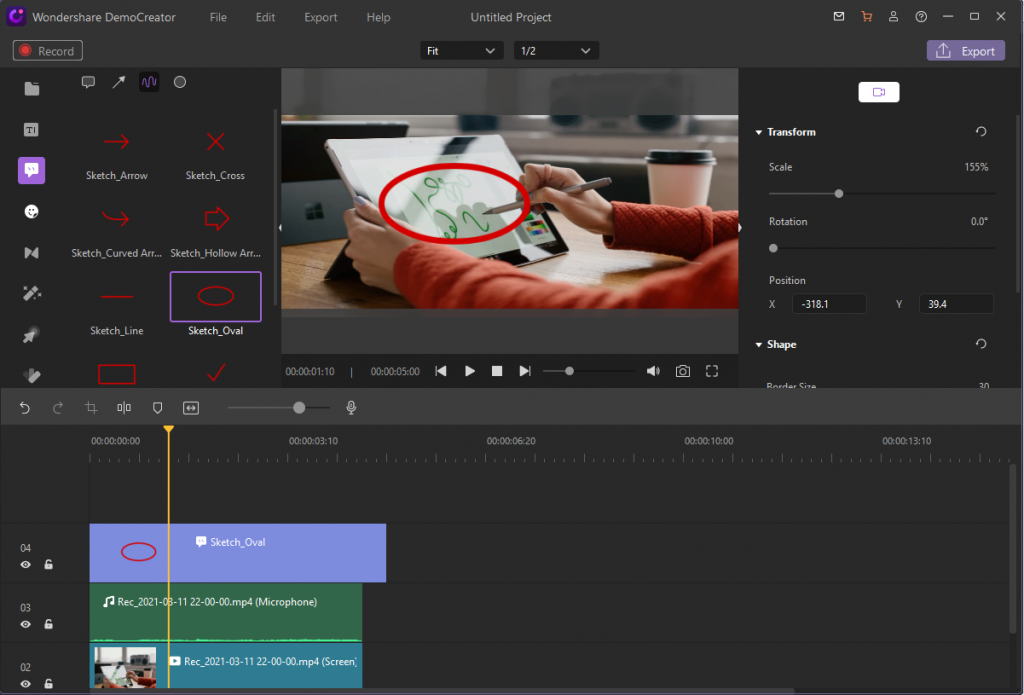
DemoCreator will open the video editing windows after recording. In the video editing window you can mark the part of video which you think is important for you or you can also write annotations on the video parts.
- If you want then you can also add the highlight, circle, rectangle, arrow, line pen to the videos. You can add these features to your video by going in the Annotation section of the Wondershare DemoCreator editing mode.
2. Remove the part you don’t want
After recording your video if you are not happy with any part of the video then you can remove it using the video editing mode of the Wondershare DemoCreator.

- Add cursor effect for your video
Wondershare DemoCreator also offers you to add the cursor to your videos. You can add cursor effect to your video just by going to the cursor effects menu of the video editor. This is very help when you are creating a video for tutorial purpose. The target audience can notice your mouse cursor movement and understand what’s going on in the video.
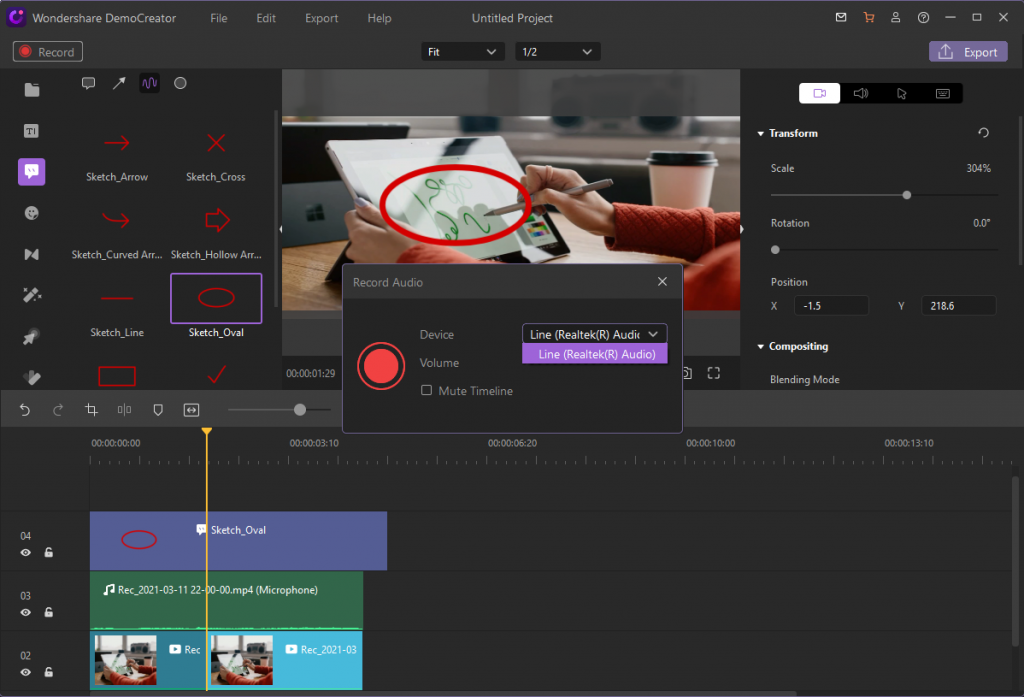
- You can also record audio after recording like voiceover
After finishing your audio recording you can also record your own audio and add it to the any part of the video you have created. This is really very easy and you can easily record and add any audio.
- Record Videos for Gaming:
Wondershare DemoCreator enables you to record the videos for gaming purpose as well. While recording videos for gameplay and guide instructional videos for the target public you can easily record the video with your picture as well in the side window of recording screen. Wondershare DemoCreator allows you to increase or decrease the size of your video frame as well.
- Use Wondershare DemoCreator as a Video Editor:
Wondershare DemoCreator can be used directly as video editor as well. When you first launch the software then you can choose whether you want to record new video or you want to edit the previous videos on your computer. To edit the videos from your computer hard drive you just need to click on the “Video Editor” then then you can browse the video from your computer and edit them to post over internet.
- Subtitles:
If you want to use text with the video then Wondershare DemoCreator offers you subtitle option which can be used to add subtitle for your videos. This option is available in the video editor which can be used after finishing the recording of your video. You can write your own subtitles for the video and apply them on the tutorial to help your viewers to understand what’s going on in the video.
- Stickers:
Stickers are also a very powerful feature of the Wondershare DemoCreator and stickers really helps a lot people to understand the video. There are many stickers offered in the DemoCreator to use with your videos. You can find the different categories stickers in the program such as education, background, gestures, games, social media etc.
- Video Cursors:
Sometimes while making presentation videos or tutorial videos you may need to show where you are moving your cursor in the video. In that case you may feel that you need any marking area near your cursor which moves whenever you move the cursor on the screen in your video. This feature is also offers in the Wondershare DemoCreator for you. Not only one it offers you 5 different types of cursors to use with your videos. Even there are sound cursors offered which click release the click sound when you click from your mouse. For magnifying any part of your video also there is a magnify cursor available in the program.
Export the video
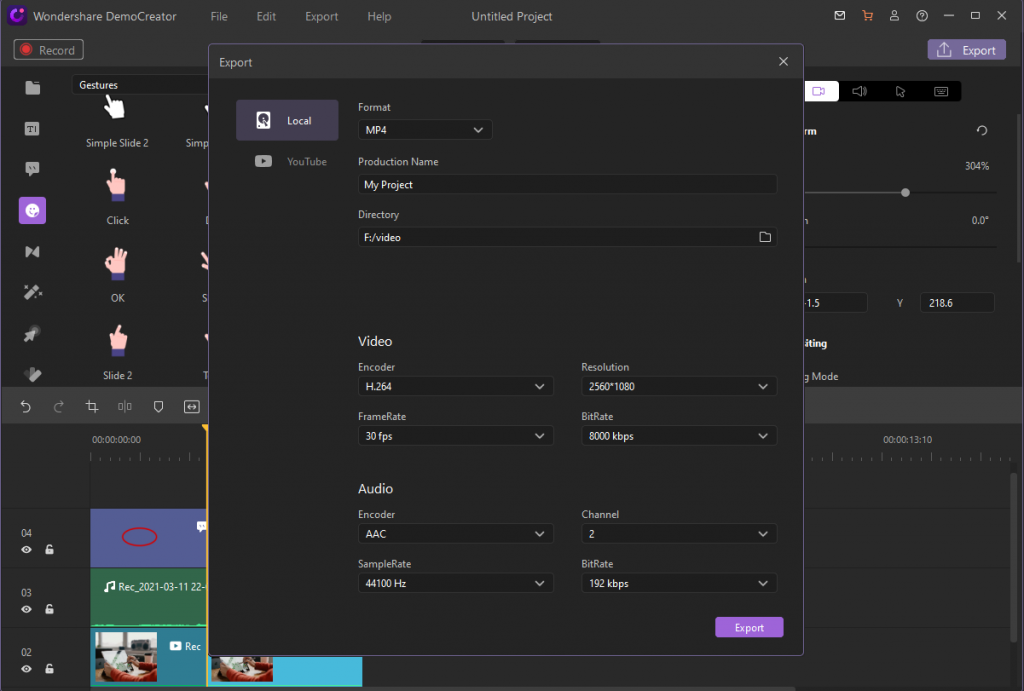
Once you have finished the editing of your video then you can save the project on your computer or directly share it on the social media sites. To export the video on your computer click on the “Export” button at the upper right corner then select the location of your computer where you want to save it. Finally click on the Export button in the popup and the video will be saved on your computer.
Concluding
Wondershare DemoCreator allows users to record the screen in HD quality so the target users will see the same as you are watching while recording the videos on your screen. If we talk about the audio then the Wondershare DemoCreator is able to record audio in the high definition original quality. It records everything without any disturbance in the audio and you and viewers can easily understand every sound in the video very clearly.
