To sign up for our daily email newsletter, CLICK HERE
In Minecraft, chickens are a valuable resource, providing players with meat (cooked chicken), feathers, and eggs. Whether you’re playing in Survival mode and need a reliable food source or you’re looking to gather materials for arrows, setting up a chicken farm is a practical and rewarding project. If you’re running your farm on a multiplayer server minecraft, it’s essential to have reliable minecraft hosting to keep your farm accessible to you and your friends 24/7. Choosing the best minecraft server hosting ensures that your server remains stable, allowing you to manage your chicken farm efficiently without interruptions. This guide will walk you through how to build a simple chicken farm in Minecraft, which can be easily set up in any game mode.
Step 1: Gather the Required Materials
Before you begin building your chicken farm, make sure you have the necessary resources. For a basic farm, you’ll need the following materials:
- Fences (20-30, depending on farm size)
- Fence Gate (1)
- Seeds (for breeding chickens)
- A few chickens (at least two to start)
- Hoppers (Optional, for automated egg collection)
- Chests (Optional, to store eggs or items)
- Water buckets (Optional, for auto collection of eggs)
You can gather fences by crafting them from wood, and seeds can be obtained from breaking grass. Chickens can be found roaming plains or forest biomes, and you’ll need at least two to begin breeding.
Step 2: Choose the Location for Your Chicken Farm
Find a flat, open space near your base or wherever you want your farm. The location should be easy to access, as you’ll want to check on your farm regularly to collect eggs, feathers, or meat.
If you’re building in Survival mode, it’s best to place the farm near your food supplies or base to save time traveling back and forth. If you’re running this on an mc server host, the location of your farm should be easily accessible for all players to maintain it.
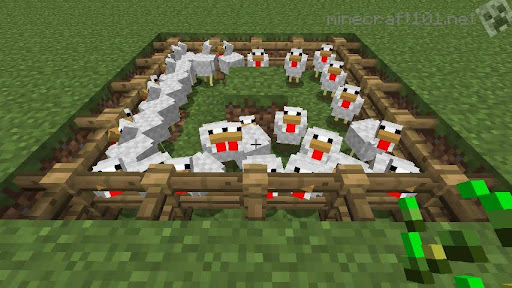
Step 3: Build the Enclosure
Create a fenced area to house the chickens. A simple farm doesn’t need to be large, so build a square or rectangular area with your fences. A 5×5 or 7×7 enclosure works well for starting out.
Leave space for a fence gate on one side, which will act as your entrance to the farm. This will allow you to enter and leave easily without letting the chickens escape.
Add the fence gate to close off the enclosure.
Step 4: Lure Chickens into the Enclosure
Once the enclosure is ready, it’s time to get chickens into the pen.
- Hold seeds in your hand to attract nearby chickens. Chickens will follow you as long as you have seeds equipped.
- Lead them into the enclosure by walking through the gate. Once they’re inside, close the gate behind them to keep the chickens contained.
- Repeat this process until you have at least two chickens inside. Starting with two chickens will allow you to begin breeding them for a steady supply of eggs and meat.
Step 5: Breed the Chickens
Breeding chickens is essential to expanding your farm. Here’s how to do it:
- Feed seeds to two chickens to enter them into “love mode.” Hearts will appear above their heads, and after a few seconds, they will produce a baby chick.
- Continue feeding seeds to breed more chickens. The baby chickens will grow into adults after 20 minutes, and you can breed them again to increase your chicken population.
Breeding regularly ensures you’ll have a constant supply of chickens, which will produce eggs and provide meat when needed.
Step 6: Collect Eggs
Chickens in Minecraft will lay eggs approximately every 5-10 minutes. Eggs can be collected manually by entering the pen or by using a simple automated system.
Manual Egg Collection:
- Simply enter the enclosure and pick up the eggs that the chickens have laid. Eggs can be used to breed more chickens or thrown to potentially spawn new chickens.
Automated Egg Collection (Optional):
To automate egg collection, you can place hoppers underneath the enclosure:
- Replace the ground of the enclosure with hoppers connected to a chest. The hoppers will collect any eggs that the chickens lay on the ground.
- Place a chest next to the hoppers to automatically store the eggs. This saves you time from manually collecting them.
If you’re hosting the game on a minecraft best server, automating egg collection ensures everyone on the server can benefit from the farm’s efficiency without constant supervision.

Step 7: Harvest Chickens for Meat and Feathers
Once your chicken population has grown, you may want to start harvesting chickens for cooked chicken and feathers.
- Wait until you have a good number of chickens before harvesting. You’ll want enough chickens remaining in the enclosure to continue breeding.
- Use a sword to kill chickens for raw chicken and feathers. If you want cooked chicken directly, use a sword enchanted with Fire Aspect to cook the chicken as you harvest it.
Alternatively, you can set up an automatic cooker farm using dispensers with lava, but for simplicity, manual harvesting is enough in this basic setup.
Step 8: Maintain and Expand Your Farm
As your chicken farm grows, you can expand it to hold more chickens or build multiple enclosures to separate chickens for different purposes (egg production, breeding, meat harvesting). You can also upgrade to a more automated chicken farm using redstone, dispensers, and water streams to collect items without needing manual labor.
Keep breeding chickens and harvesting resources to maintain a steady supply of eggs, chicken, and feathers.
Conclusion
Building a simple chicken farm in Minecraft is an easy and effective way to ensure you have a reliable source of food, feathers, and eggs. With just a few materials and a bit of time, you can create a farm that will serve you well in both Survival and Creative modes. Whether you’re just starting out or looking to expand your resources, a chicken farm is a great addition to any base.
