To sign up for our daily email newsletter, CLICK HERE
Remember how annoyed you were when you returned home from a fantastic performance by your favourite band only to find that half the photos you had taken were blurry? Perhaps the subject was shifting, the camera was shaking, or the lighting wasn’t ideal. Whatever the cause, the harm could appear to be unfixable. Fortunately, blurry photographs can be corrected. You may find a solution of how to fix blurry pictures. But don’t get any idea yet. This article we will discuss some effective solution to fix blurry pictures by using the appropriate photo restoration software.
The Cause of Blurry Pictures
Here are some reasons of blurry pictures:
- Unprofessional camera work
- Lack of attention
- A sluggish shutter speed
- Too little depth of field for the subject
- An underexposed photo
Wondershare Repairit: What is it?
Wondershare Repairit is an effective photo repair program which repairs thousands of photos, videos, pdf and other document without any pain. Regardless of the format, it Portable gives users a simple approach to mending their damaged films. It should be easy to use, and it might be worth a shot if nothing else produces reliable results. The application is simple mainly because there aren’t many settings on it. Users can add the videos they want to fix, and the program will analyze and restore them afterwards.
Most likely, the entire process will go quickly. Your video file size does have a role, to some extent. No matter what tool you use to restore films, a piece of advice is to add one file at a time and make an effort to fix your damaged files in the same manner. If we believe what Wondershare Repairit Portable’s creator states, this program will succeed where others have failed.
How to Use Repairit to Fix Blurred Images
Step 1: Include Damaged Pictures
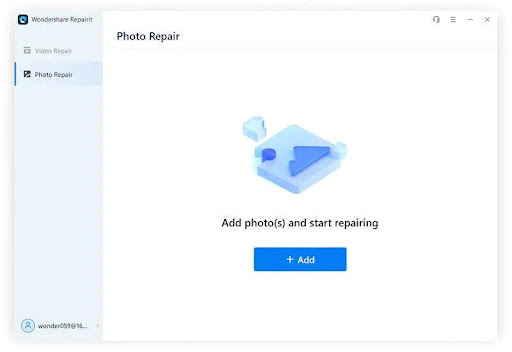
On your computer, launch Wondershare Repairit, then navigate to the “Picture Repair” option on the left-hand panel. To import the damaged video onto the platform, click the “Add” button.
Step 2: Start the photo repair process.

Once you’ve added the right photo, you must next click the “Repair” option to start the procedure.
Step 3: Examine the outcomes and save

On the following screen, a preview of the corrected photo is available. Watch the fixed picture by selecting “Preview.” Click “Save” to export the restored image to your device if you’re happy with it.
Key Characteristics of Repairit
Video recordings, pictures, and photo files can all be recovered and restored using Repairit. Repairit enables customers to get more out of their digital lives by using cutting-edge data restoration and recovery techniques to fix damaged or corrupted files that cannot be opened.
- User-friendly App
- Tested to be virus-free
- Safe and secure
- The user interface is helpful and clever.
- Download the newest Version instantly and without charge.
- There are files in standard definition, full HD, and 4K quality.
- Before saving the recovered video files, you can see them in a preview window.
- The app supports all Windows and Mac OS versions.
- No limitations apply to the size of video files that can be fixed.
- Fixes any unavailable movies that are corrupt, broken, or damaged.
- There are no restrictions on how many damaged Video files can be created, either.
- Video restoration for all widely used cameras, including GoPro, DJI Drones, Dashcams, and other videos
Alternative Solutions for Blurred Images
VSCO
If you need to sharpen a photo while you’re on the road, VSCO is one of the best photo editing applications. Both Android and iPhone devices can use it. Here’s how to use it to improve your shaky photo:
- Launch VSCO, and then import the picture.
- In the Studio view, choose the slider icon.
- Choose the tiny up arrow located close to the bottom of the screen. From there, choose the slider menu. The tool you want to use can now be chosen by you.
- Select the triangle-shaped sharpen tool, which has an open end. The sharpness slider is then turned on.
- Clarify the image as needed and save it.
Photoshop
The most often used photo restoration program is Photoshop. You may unblur photos with this robust software in a variety of ways.
- Open Photoshop Elements to get started.
- Select the picture you wish to alter.
- Filters can be chosen from the menu bar.
- From the drop-down option, choose Enhance.
- Choose Unsharp Mark.
- Change the quantity and radius as necessary.
Blurity
If you have a Mac, Blurity is a tool you may use to correct blurry pictures. It is free to use. However, the final image will have a watermark.
- Visit the Blurity website on the Mac.
- Install it on your PC after saving it there.
- Click the blurred picture.
- Unblur the area of the image that you want to be precise.
- Choose Process from the menu.
- Allow the Blurity application to complete its work.
- The image should then be saved.
Conclusion
You may also choose the Wondershare photo repair tool, which can help you get your films back up and running in no time for even more convenience and a speedier option to repair your files. The best part about this data restoration tool is that using it doesn’t need any time-consuming sign-up procedures and is free. Any video or photo you submit to this tool will be safe and secure, and our Privacy Protection System ensures that it won’t end up in the wrong hands. Try out the finest photo recovery tool today with Wondershare Repairit, one of the top photo restoration tools on the market, which is available for both Windows and Mac.
